Switching to Linux: My Experience
I have now graduated, which means I no longer have to worry about any sort of schoolwork. This also means that I can now venture off and explore other aspects of technology. I am now going to explore the world of Linux from the power user/desktop perspective. I have exclusively used Windows for the entirety of my school, so this would be a great step into what I believe could be a great experience.
Considerations When Switching
There are many things that one would consider when switching from Windows to Linux. Key questions include:
- Application Compatibility: Will your applications or programs work on Linux?
- Functionality: Will you be able to do the exact same things you would in Windows on this new Linux machine?
A popular example is the gaming scene, where people who exclusively use PCs for gaming might feel inclined to stay in Windows compared to Linux, which can bring a whole new set of problems for them.
My Needs as a Developer
I am not a gamer, and my needs in a computer are primarily focused on the development experience. Nearing the end of my school time, I have grown considerably annoyed with how it is to develop in Windows. Recently finishing my senior design project, (BLOG POST SOON ™) , but even installing basic things like the ESP-IDF and even workflows such as building and flashing environments felt like I was stitching everything together with a band-aid, never really experiencing a stable environment. Things would break if I wanted to work on other projects, where the Python version was different that the one that Espressif uses. I knew there had to be a better way (Also the cli in a Unix machine is far more intuitive than anything Windows attempts to do; try creating a file in Command Prompt).
Finding the Right Distro
Before diving into the pool that is Linux, I had already watched various YouTube videos regarding the matter. Specifically, how to perform a transition to make sure you don’t get overwhelmed by such a different way of computing. A YouTuber that I find very helpful in this regard is ChrisTitusTech, who had been the main person I would watch for Linux content. I feel like he presented it in such a way that made me understand why Linux is the way it is and in the end better for certain people compared to Windows. Below is a video that I think illustrates the vision that Linux can bring to someones setup and overall computer experience.
The next thing to do was to find a distro or distribution to install. Having known the process of installation being very similar to Windows and having faint memories of installing Linux on a very, very old laptop (I can’t remember which one, only that is had a Bird as the wallpaper); I just needed to find the perfect one for me to jump into this new era. Chris has a Linux tier list which I’ve watched various times over and over to see his opinion on why he ranked things above other things.
From the get-go, I knew I did not want to install Ubuntu simply because for any Linux experience that I had, I just had always installed Ubuntu and never looked any other way. So I didn’t want to stick to that again. I wanted a new different take on Linux. Also, Chris Titus is not very fond of Ubuntu so that kind of helped my bias in a way.
The Winner: Arch-Linux
So after finally making the decision, I made the decision that I wanted to install Arch Linux. Now Arch is very known in the Linux community for being just different than all the others. And one reason for that is because of the rolling release model that the maintainers of Arch have adopted for this OS.
The rolling release model is simply put a way to handle packages. It means that packages are continuously updated, unlike distribution updates and major releases that others like Ubuntu might make. Arch Linux has this rolling release model, allowing any package to be updated at will without needing a new distribution version to dictate versions, its all up to the user.
Alongside that, Arch has a very minimal install ISO file which was very attractive to me because I wanted to see how my now aging PC would perform with the least amount of “bloat” (pre-installed software) as possible . I wanted to see how that would fare compared to my current Windows performance.
Installation Process
Installing Arch can be a bit of a hassle from scratch but thankfully I came across a YouTuber named Typecraft who had actually been recently working on a series of videos on tutorials for installing Arch with a newer tool that came embedded into the ISO called archinstall. This tool facilitates the process of mounting the drives, selecting audio interfaces, etc. from the command line which made it extremely lightweight and very easy to set up thanks to his videos.
After finding a USB drive (those are always lost when you need them), I flashed the ISO, and started the process. I felt the rush that I had as a kid on Christmas since I was trying something new. At this point, I had a very strong feeling that I would really enjoy this for a long time. Just like that, we had installed Linux—Arch Linux, by the way.
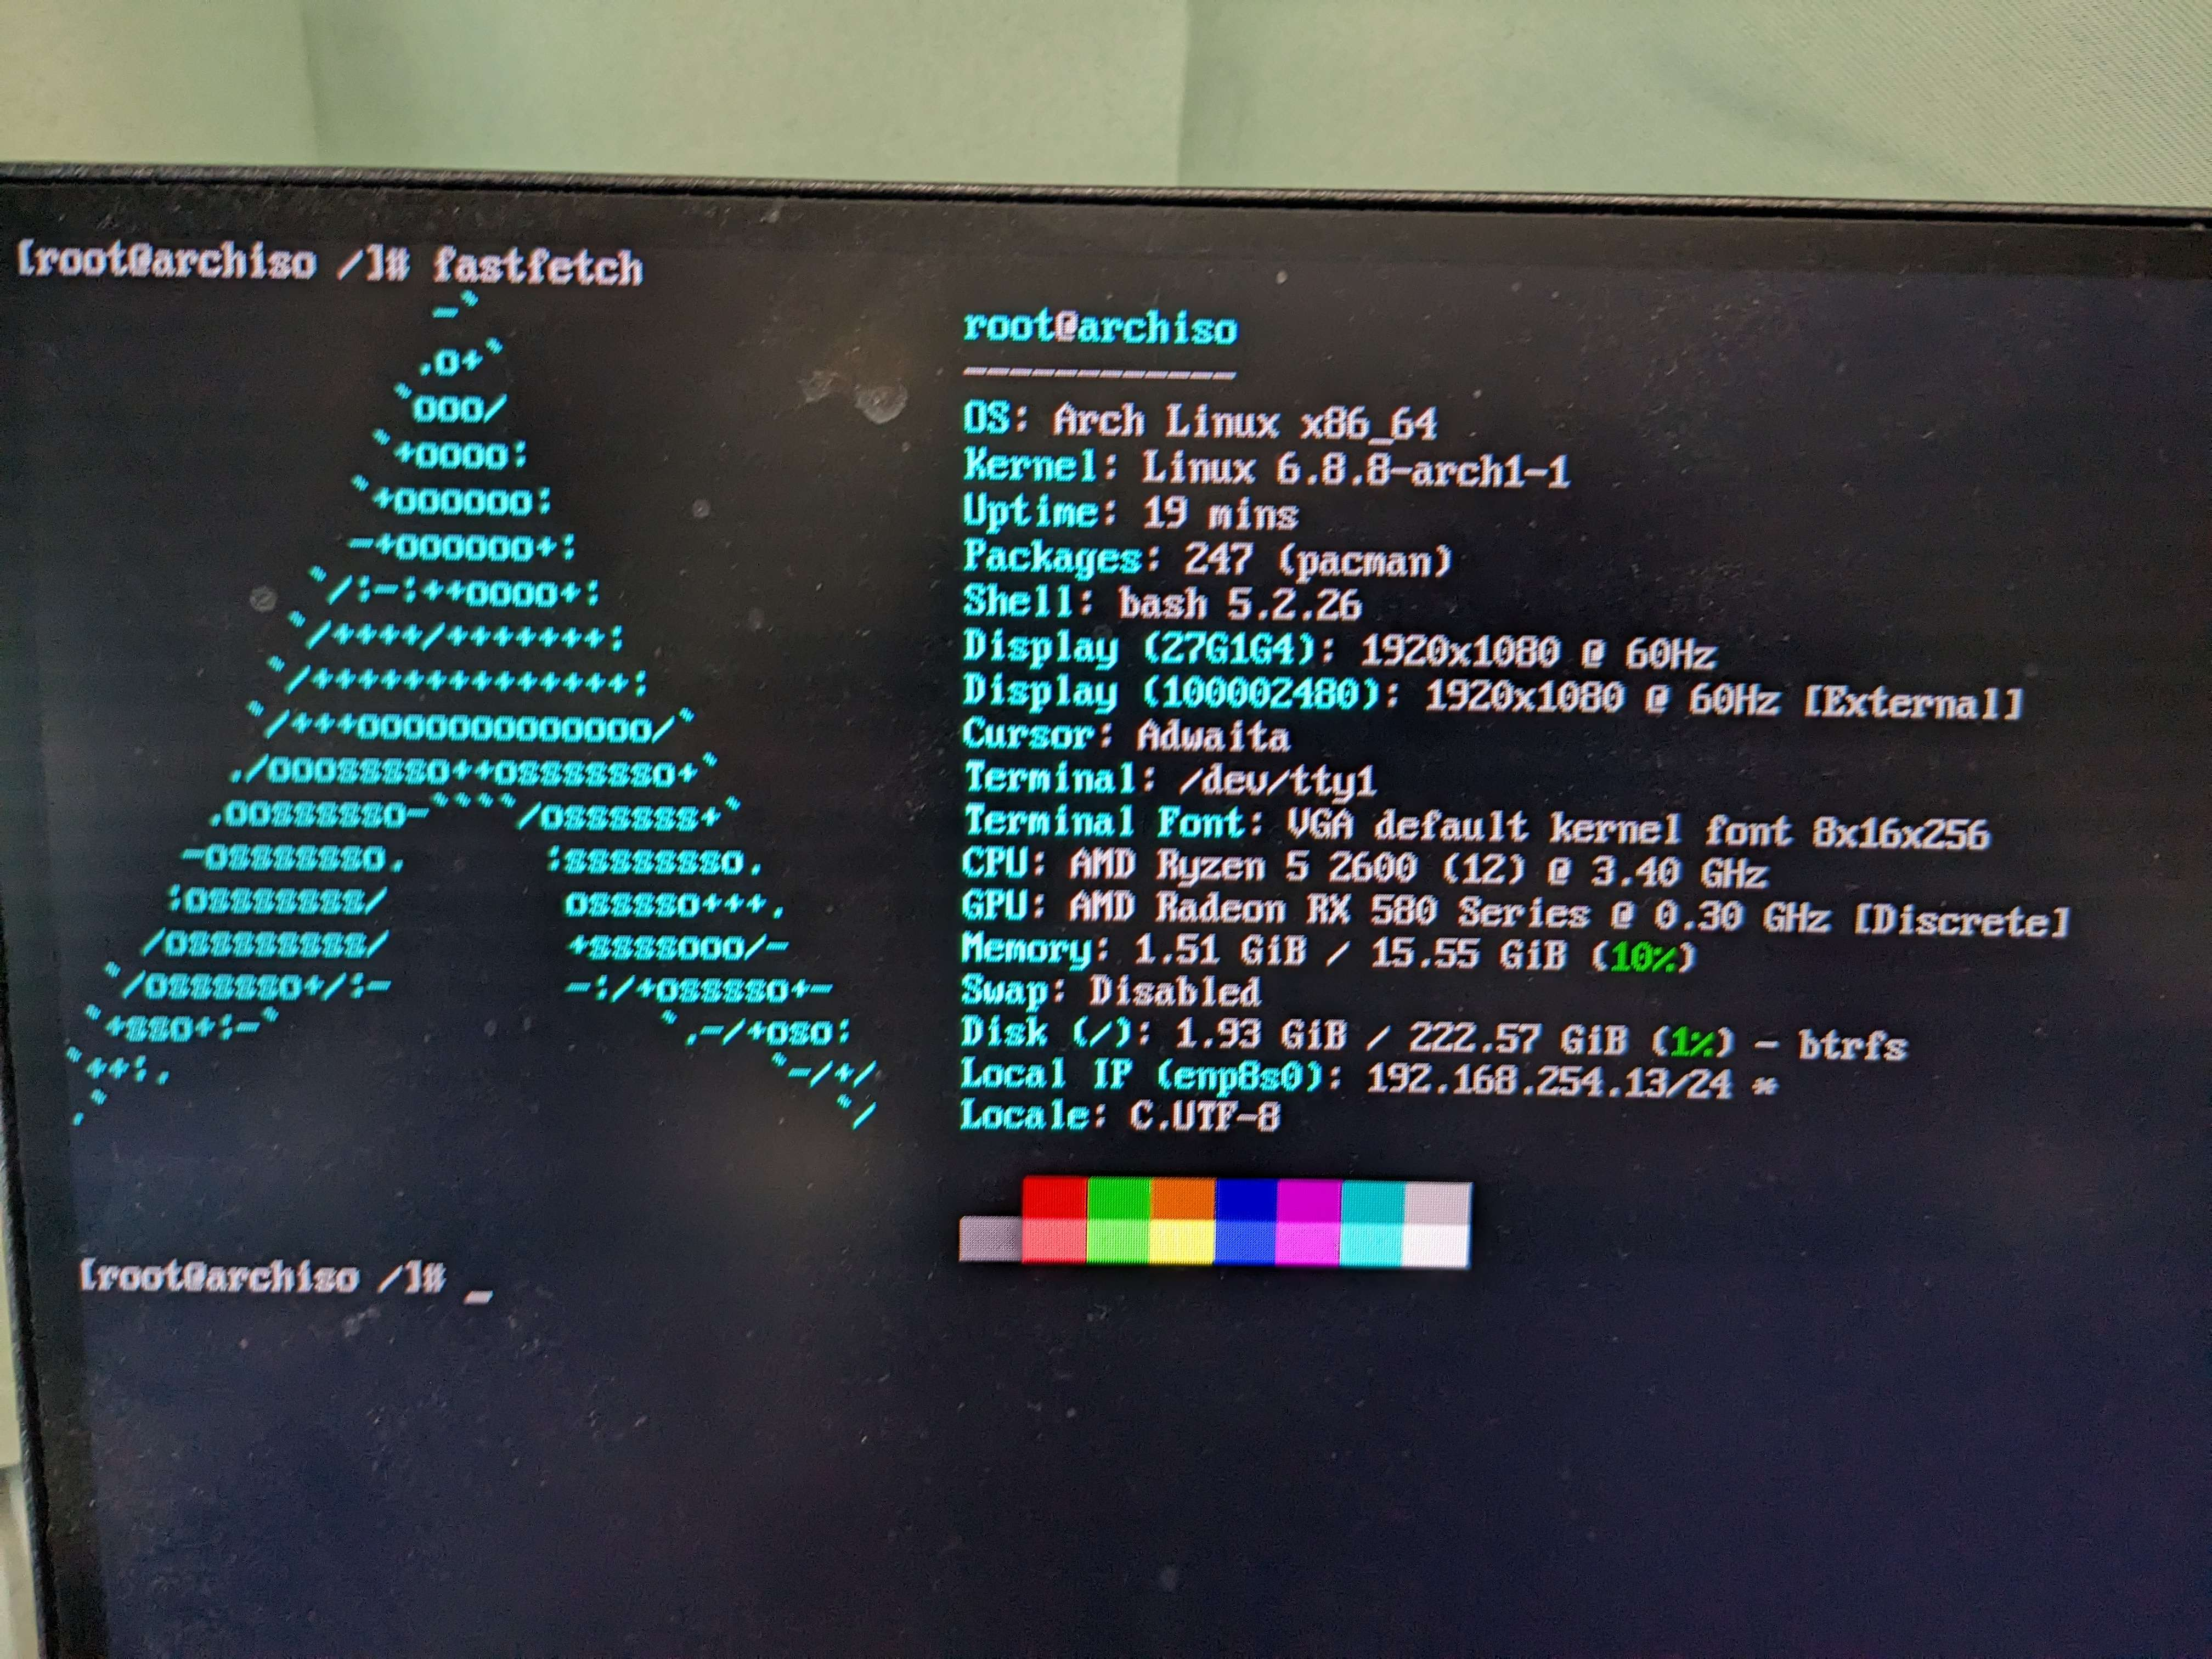
I decided to skip the desktop environment section of the Arch install and installed KDE separately. There was the option for GNOME, but GNOME comes in Ubuntu and it just seemed way too similar to Ubuntu, so I didn’t go that route. Installing KDE separately from the Arch install involved a lot of googling. Through that googling, I learned a lot regarding Linux desktop concepts such as display managers, desktop environments, desktop managers, etc.
Once I installed the desktop environment, I was in! The first thing I wanted to do was get all of my core apps installed. This included things like Discord, Spotify, some sort of Chromium browser, and VS Code. However, since I was committing to Linux, I decided to switch from VS Code to Neovim.
Throughout this package process, I also realized that since this was a minimal install, as expected, some base features were not installed. The first one I noticed was the SSH command, so I had to go and install OpenSSH and other packages that I came across that I needed.And after that, I was able to install all my packages that I wanted at the time and sort of simulate my experience on Windows.
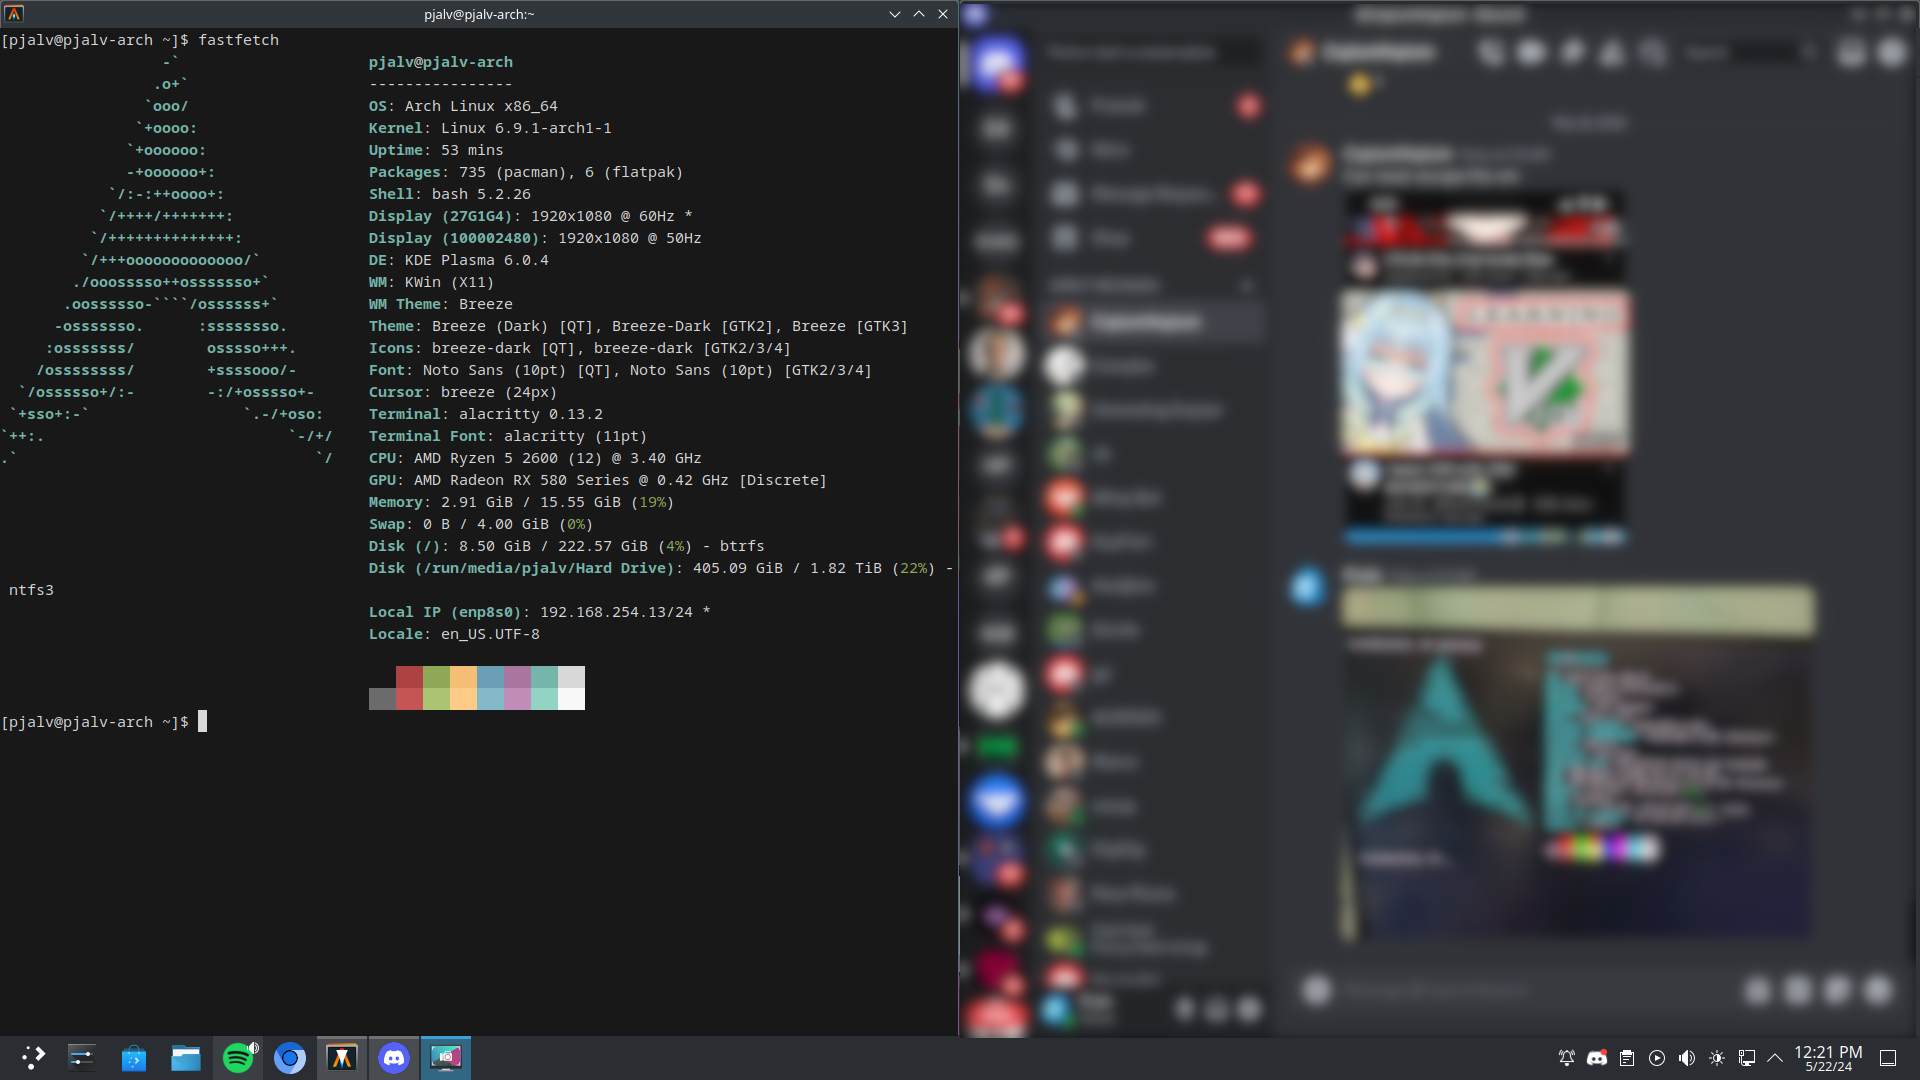
Things I Learned Throughout the Process
For Linux, I realized that customizing your setup can take ages and to this day, I still find that I want to change something in the themes or the setup. There are various ways to customize. For example, what terminal you use, how you theme that terminal, what shell environment do you use, do you use Bash, do you use ZSH?
And this might seem daunting coming from a Windows user trying to test something new, but it honestly wasn’t that hard. They were all super easy to try out. You essentially either look it up on Google, find the GitHub repo, install the package, test the package. If you like it, you keep it. If not, all you have to do is uninstall that package and it goes away.
Alongside this ease of test, there’s also the ease of configuration. For all of the packages and tools that I’ve installed, the way to configure them is literally just a file. There is no GUI that the tool needs to come with for editing how you want a certain thing to look or feel. You just go into the directory of the configuration, edit the configuration, save, and test that package. If you like it, again, you keep it. If not, all you have to do is undo your changes.
On the note of GitHub repos, another thing about these customization and the various options for packages is that all of them have been open source. All of them are accessible to the users and you can, again, if you don’t like something, modify the source code or submit a pull request and it seems like a very inviting and welcome community for the Linux desktop scene.
Neovim and Current Setup, Fast Evolving
As you can imagine, having the urge to tweak something in your setup is very common in the Linux world since you’re able to do so unlike in other OS’s. One of the most major changes I’ve done is switch to a tiling window manager and desktop environment as a whole known as Hyprland.
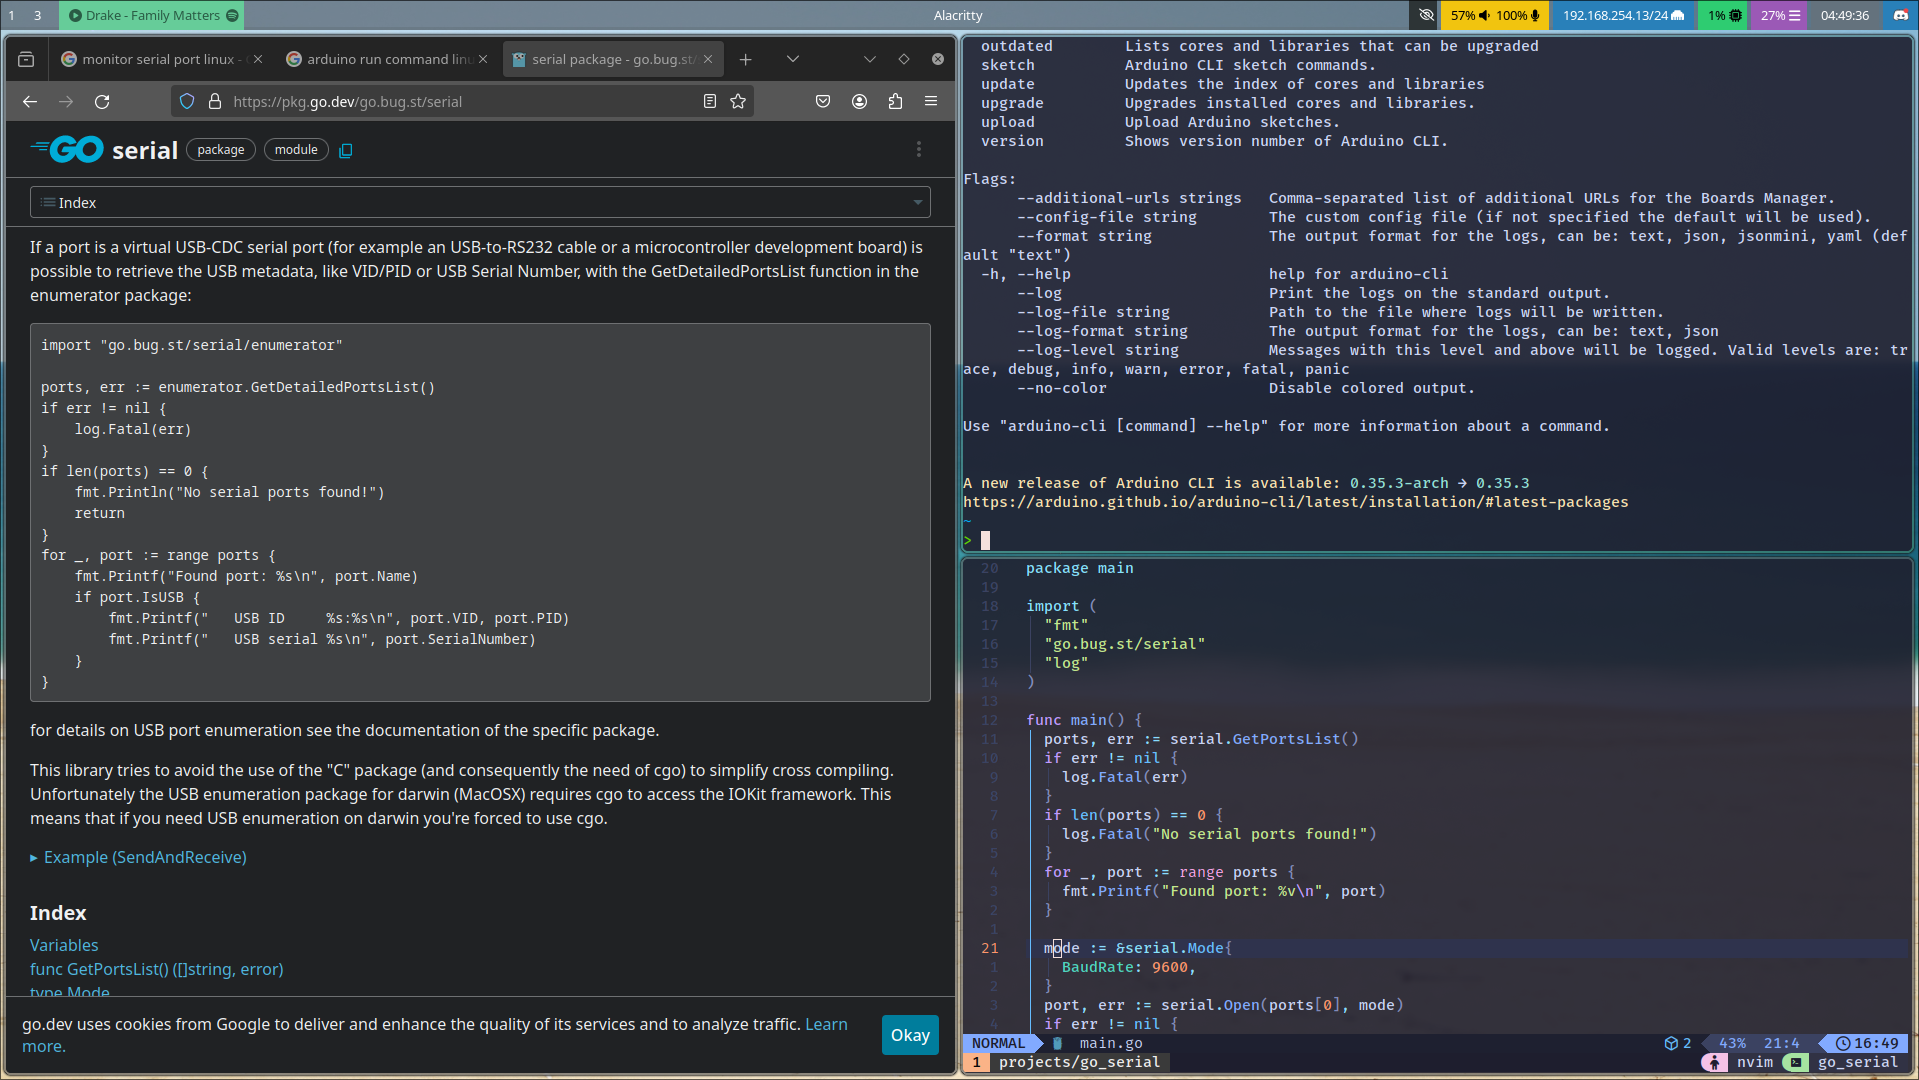
Hyprland is a window manager, but it is more specifically a tiling window manager, meaning that you have no desktop where you have icons and you click on the icon to launch a program. When you want to run a program, the GUI of the program gets shown and maximized to the real estate of your monitor. So you have no wasted space, you have no overlapping windows, everything just maximizes to your monitor in a nice manner. This is a more practical approach to using your computer compared to having a bunch of critical programs running that you might not be using at the time, consuming resources and essentially bogging down your experience.
Configuring Hyprland is easy as well since there is a configuration file, as is common. This configuration file details everything you might expect coming from a desktop settings perspective. Things like monitors, refresh rate, resolution, orientation, startup apps. What do you want to run when you log into a Hyprland session? Do you want global hotkeys for programs? Do you want to launch Discord in two key presses? Do you want to launch your browser in two key presses? Do you want certain applications to start on certain monitors if you have a multi-monitor setup? Do you want Discord to start on your vertical monitor? Do you want Chrome on your main monitor alongside a slew and plethora of other features? This is what opened my eyes even further; the options are truely endless.
It is all easy to test compared to Windows. All you have to do is press two buttons to log out, Alt + M, re-log in, and see if your startup apps and your monitor preferences have applied.
Adapting My MacroPad to Linux
As I mentioned, I have switched to Neovim, and using Neovim has been an extremely interesting experience. But before that, I want to talk about how I wanted to adapt a very popular peripheral of mine into the new Linux world, my MacroPad.
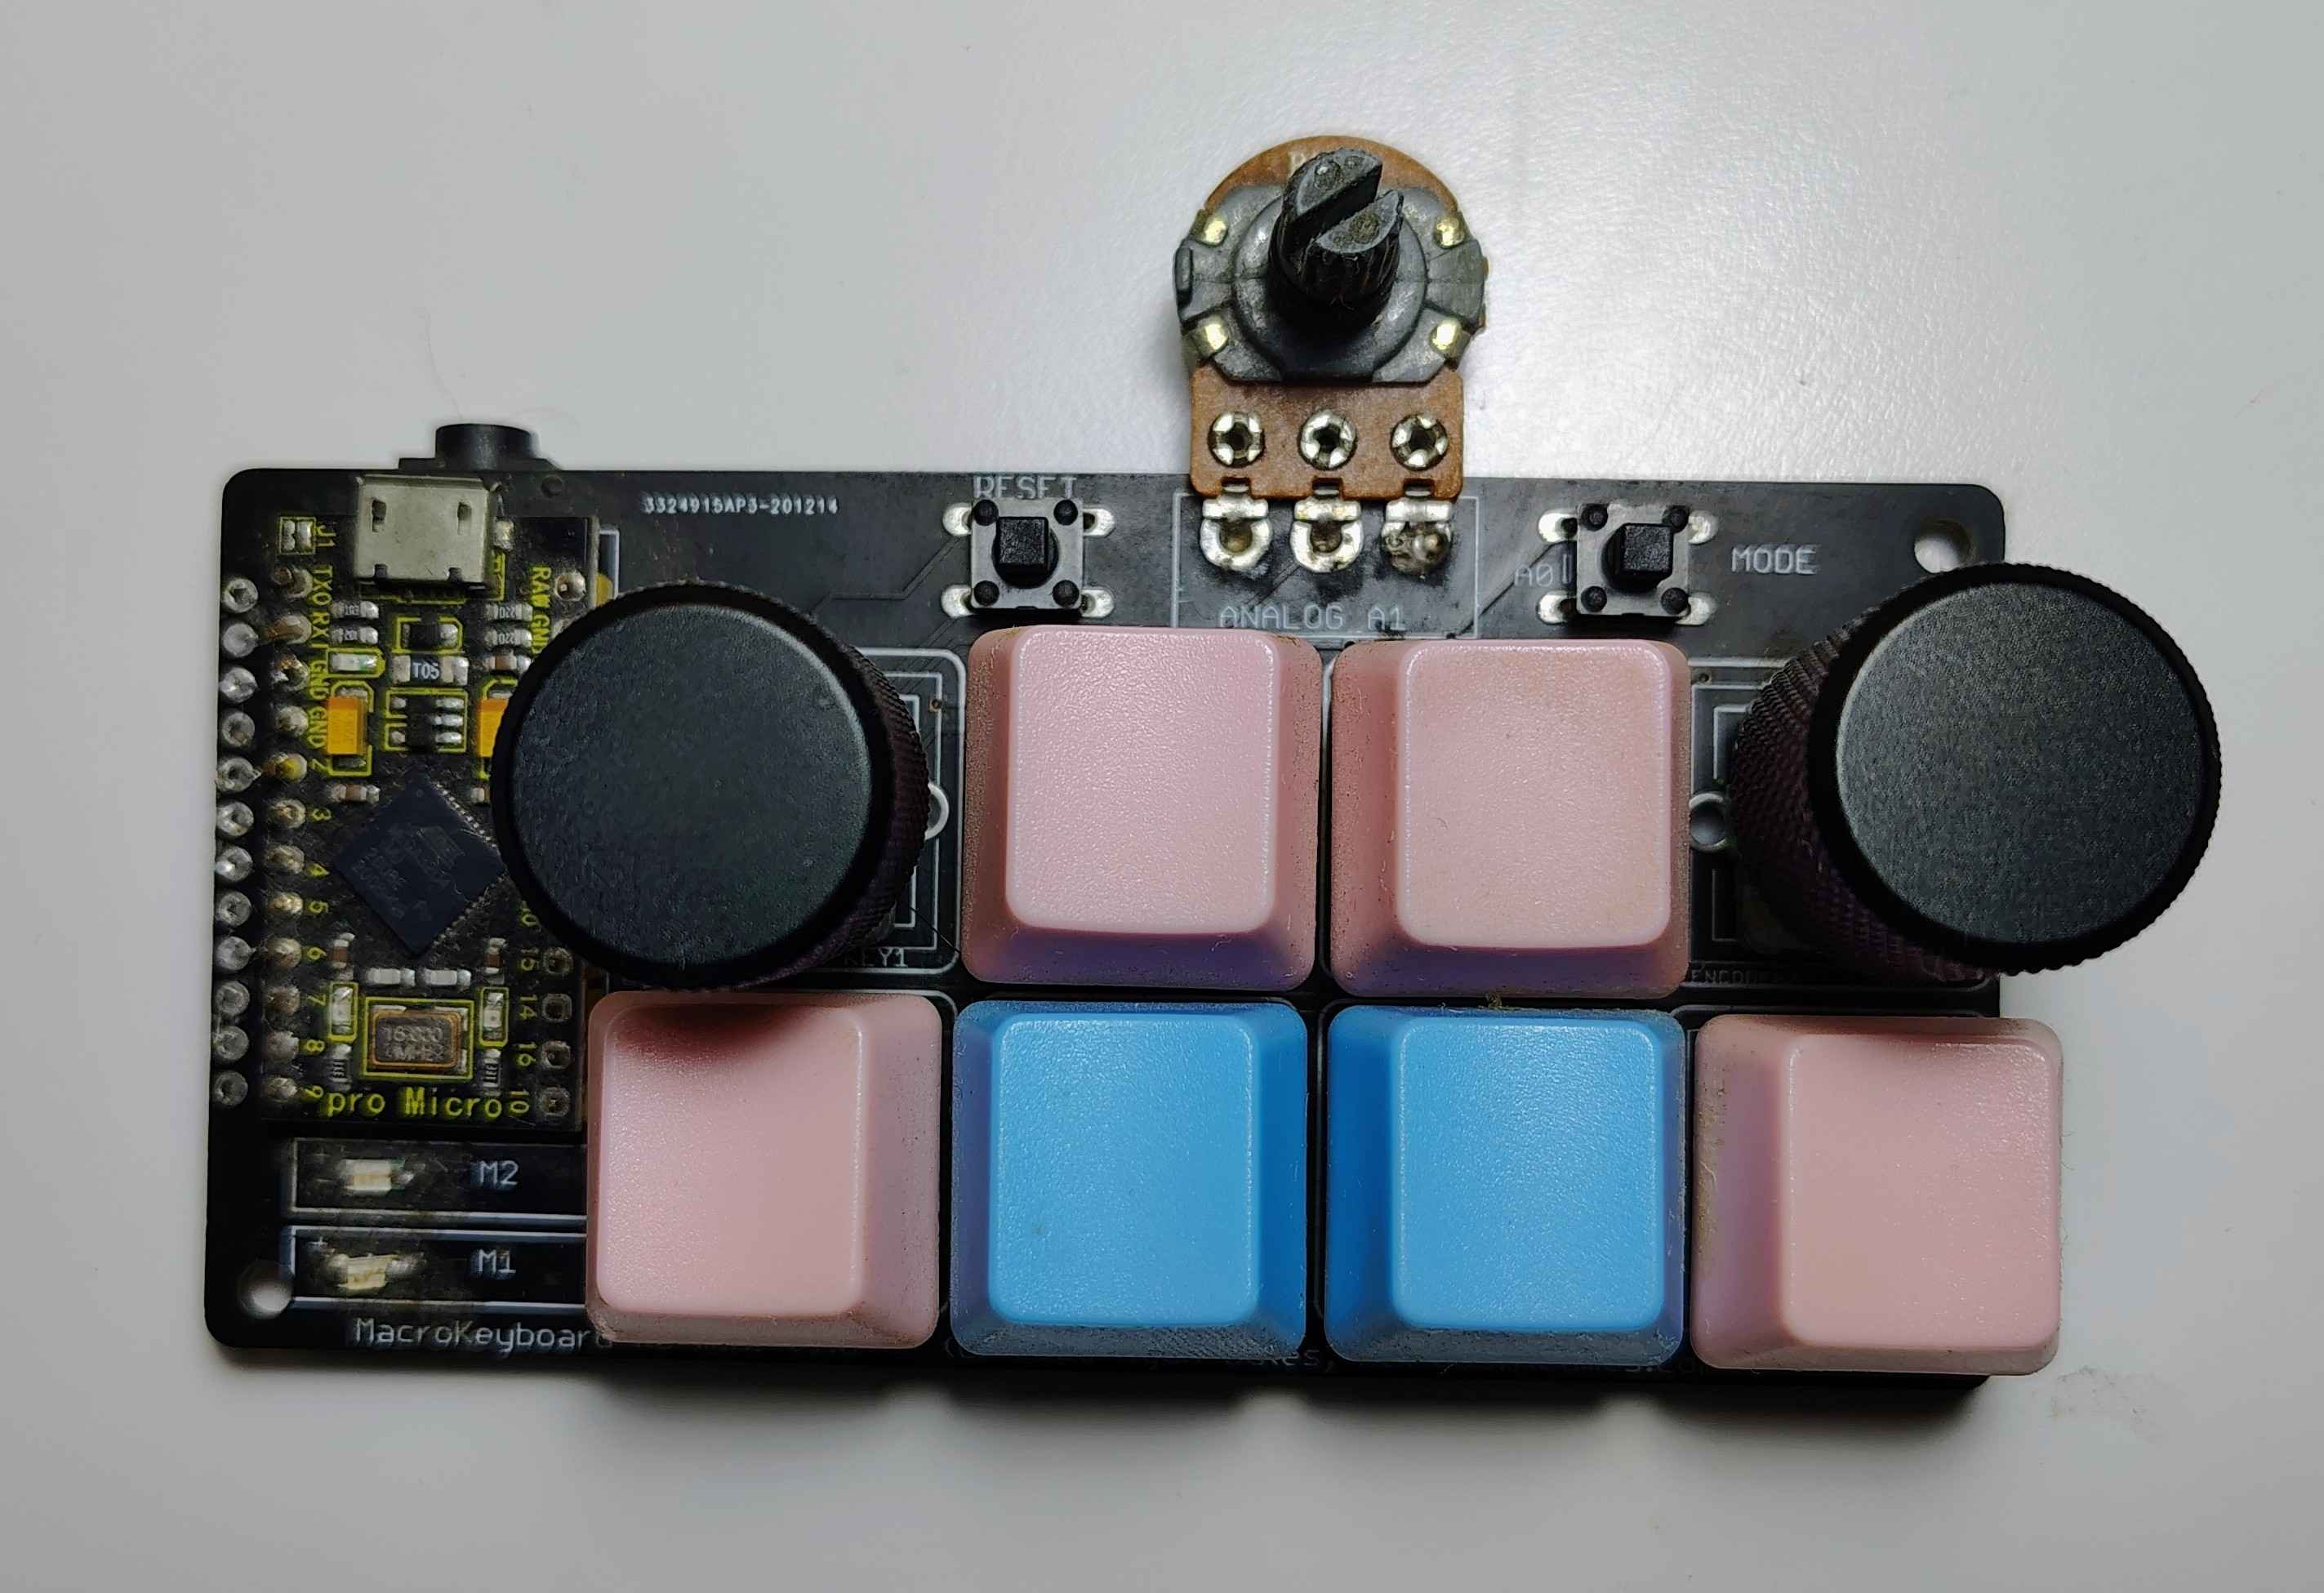
This MacroPad allows me to control my music with keys for playback and rotary encoders and potentiometers for volume for certain applications. One program I used in Windows a lot that worked well with my MacroPad was VoiceMeeter. I could have my Arduino act as a MIDI client that would control specific audio channels from VoiceMeeter.
Well, VoiceMeeter is not available in Linux, but I don’t need it. All I ever wanted VoiceMeeter for was separate volume levels for applications. So, I had to edit the code for my Arduino, which ran the MacroPad, and add another mode to account for Linux so I could have both Windows and Linux modes.
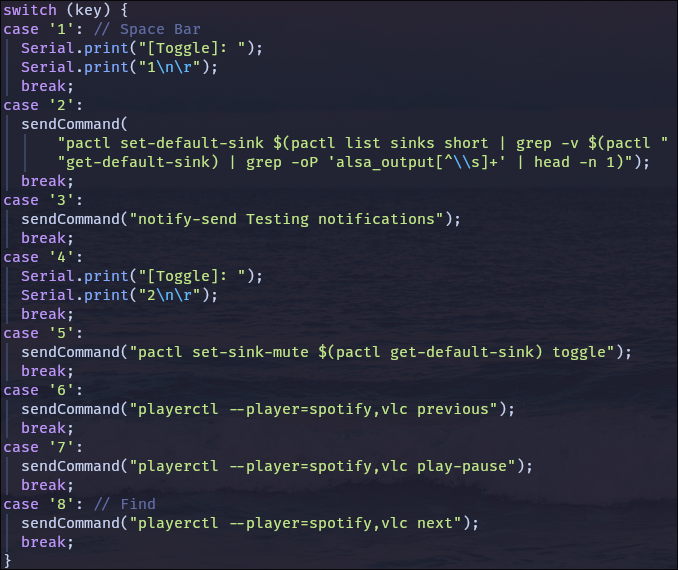
In editing this feature, I also learned a lot of things regarding command line interfaces for audio and the PulseAudio protocol and the ways to control it, as well as bash and a lot of things like that. Instead of VoiceMeeter, I now have a simple Go binary that I created that reads in the command sent through UART from the MacroPad and executes it.

You might imagine that coming from Windows, you had to install the Arduino IDE to get working, but no. Arduino provides a CLI package that you can install that will compile and flash your code onto an Arduino. So again, simplifying your development process, everything is in the terminal. You can go from Neovim to the CLI interface for flashing; everything seems extremely fast and simple to use.

No more IDE. 🤞
Setting Up Neovim
Okay, now we can get into how I set up my Neovim currently and how it feels.
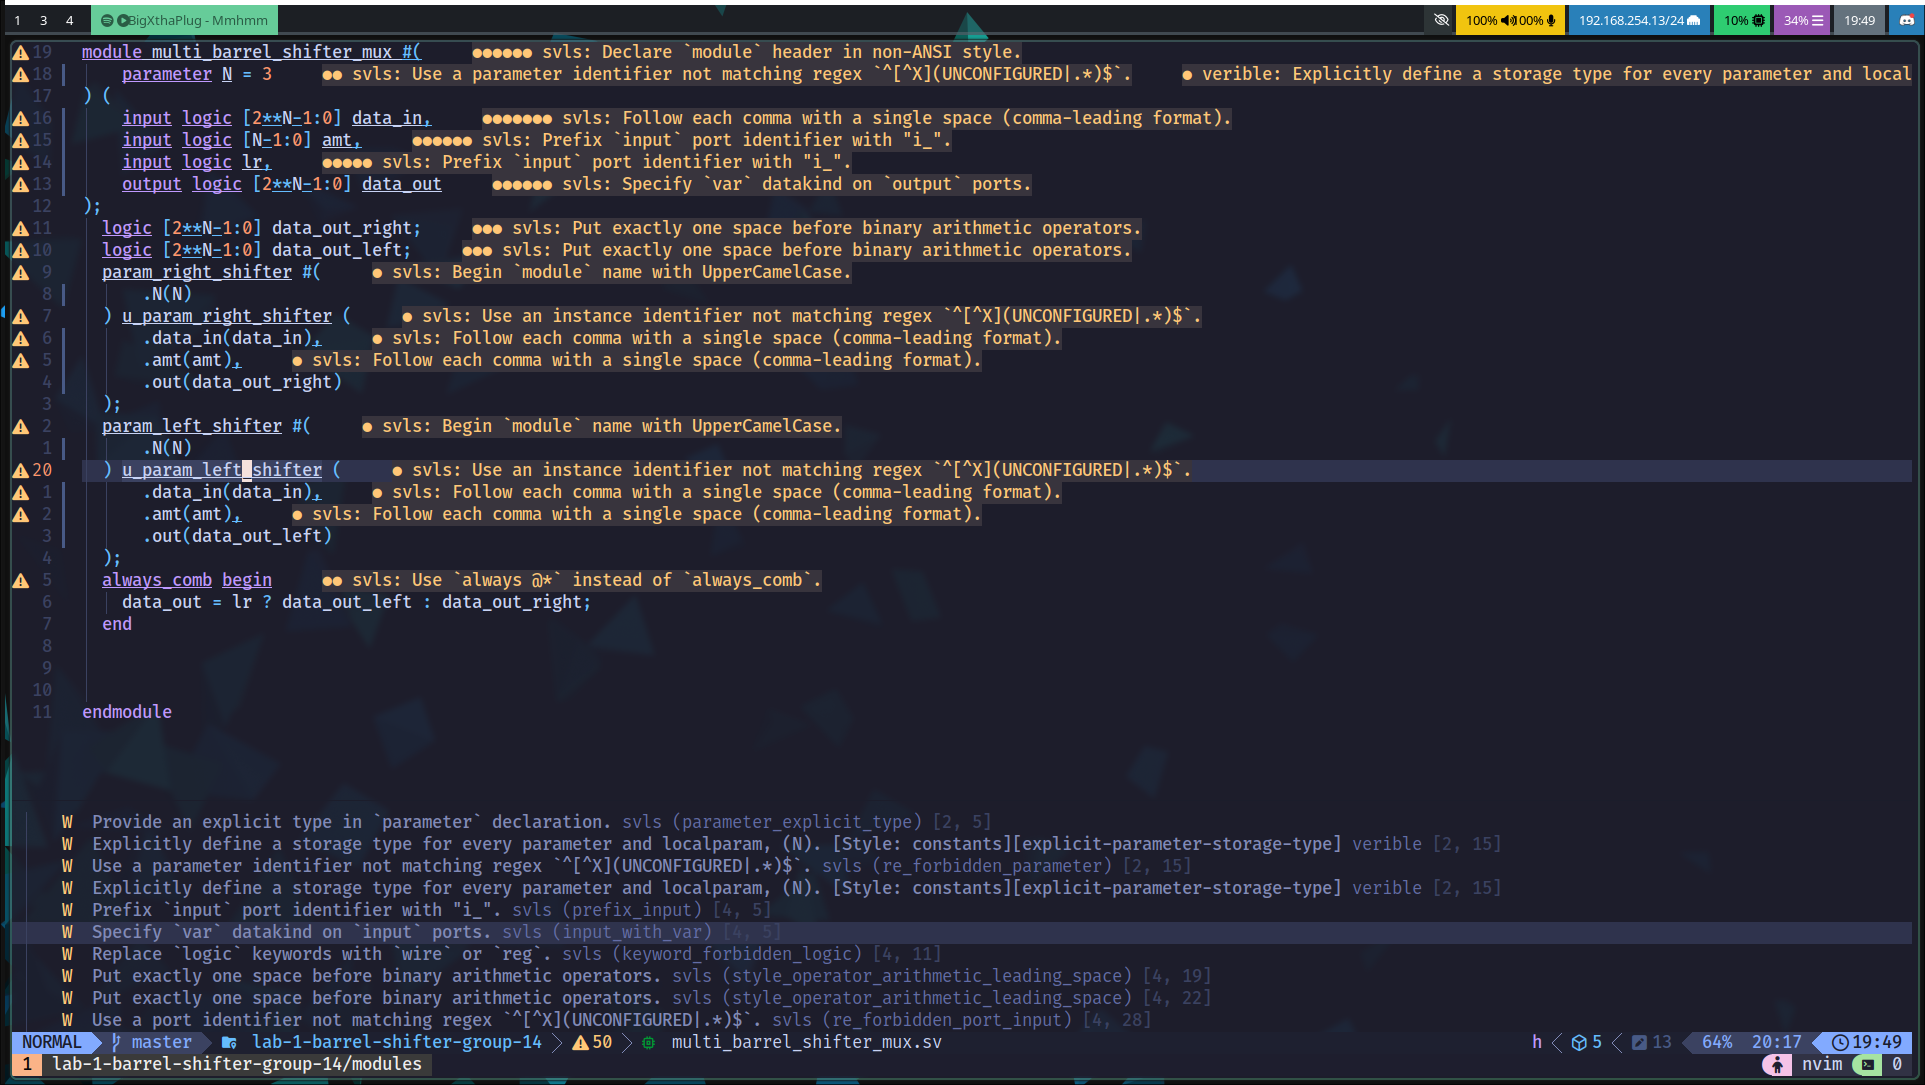
Neovim from scratch can seem like a very bare-bones editor. You have no real support like VS Code for things like file trees or file openers or extensions like VS Code might have come out of the box. So the first thing I did was again after a lot of YouTube discovered that there were Neovim distros that all you had to do was clone the repo and apply it to your config and you would have a fully fledged Neovim configuration with plugins and support for various development flows.
My distro of choice was the LazyVim distribution because of the fact that it seemed easy to install my own plugins if I wanted to in the future and the configuration that was pre-installed I enjoyed. After installation, I rebooted Neovim and was greeted with a extremely customized and aesthetically pleasing if I may add version of Neovim that was still extremely fast to open. Text renders almost instantaneously compared to VS Code. I don’t have to constantly refresh Windows if something happens, no lag scrolling through large files including with a lot of plugins.
There’s also great LSP support; or language server protocol, which I didn’t know until I switched to Linux and Neovim. Language server protocol is what gives you feedback in your code files. So if you forget to add a semicolon to your C project, if you have IntelliSense is what is popular in the Visual Studio world. If you don’t have that installed then you won’t get that error but if you do it will be inline and it will show that you have an error, etc. LSP support is convenient and simple to use in Neovim. All you have to do is search for the name for the language of the LSP that you want, install the package and Neovim recognizes it, recognizes the file format of the current file you’re editing and you now have a fully fledged LSP client that is blazingly fast to use. So it was easy for me to get started with Golang for creating my command executor for my Macropad.
Ending Remarks
Switching to Linux has been nothing but extremely satisfying and rewarding. I find myself enjoying going on my computer more and more and exploring what else I can do. I still have a lot to learn regarding the desktop, but it gives me confidence that I will take on other avenues in this Linux world.
I know I said I was going to switch fully to Linux, but the truth is sometimes you might still need Windows. And I have set up Grub for dual booting for Linux and Windows.
So, I still have no issues if I indeed somehow break my Arch install, which fingers crossed will not happen. But I can switch to Windows in a heartbeat if I need to. Another thing that I wanted to add is that I have had zero need to deal with anything regarding GPU display drivers.
My machine is an AMD machine, and after doing some research, I found that AMD’s GPU driver is pre-installed or comes included with the Linux base kernel, which is insane to me to think about. All I have to do is install Linux, and everything has worked perfectly fine. I was able to get multi-monitors set up, I was able to get audio coming out of my desktop to the monitor, and I was able to set the refresh rate of my 144Hz monitor. It just worked.
I’m sure the Nvidia users might have more issues, but there’s nothing that open-source development can’t solve.
One current issue that I am running into is finding out how to print documents from Linux. It seems like such a very simple issue that could be fixed, but I still have not found a way to get it working. But once again, I probably am not the first to run into this issue, so with time, I will get slowly and slowly into my most efficient and enjoyable computing experience thanks to Linux. My laptop is next ;)
References
1 - ChrisTitusTech - The Perfect System ↩
2 - Typecraft - Arch Linux Installation Tutorial ↩
3 - Arch Comes Alive! ↩
5 - My New Linux Desktop ↩
7 - My MacroPad ↩
8 - New Macropad Code for Linux ↩
9 - Go Macropad Helper Code ↩
10 - Arduino CLI ↩
11 - Neovim Setup Image ↩